Thinking of printing your latest hand-crafted masterpiece? Unsure on how to convert it from physical entity to digital file? We recommend scanning your artwork for the best quality outcome. So before reaching for that trusty phone camera, why not have a read below to find out why scanners are your friend. For examples, we’ve used stunning artwork from our very own Katie Bennett-Rice!
Lighting
Photographs are subject to a range of external factors, one of which is lighting. Ever noticed that yellow tinge from old lightbulbs? Well, phone cameras notice that too, and it is often visible in the photographs they take. This yellow hue will come out in the print, along with any accidental shadows cast across the work.
Ironically, lack of light is also an issue. Photographs taken in low light may appear bright while on your device due to the misleading nature of backlit screens. These images are likely to turn out darker than expected when printed— a far cry from their on-screen counterparts. Scanning ensures the image is evenly lit, rendering the whites as, well… white, and creating an accurate representation of the artwork’s original colour.
Angles
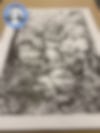
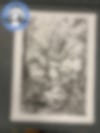
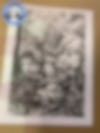
You’ve decided to go ahead and photograph your artwork, but something’s not quite right. The anthropomorphic duck in your quaint watercolour image appears a little top-heavy. And, sadly, his bill is missing. This can happen when the angle of the photograph is not quite right, resulting in a skewed, cropped version of your artwork. Without a tripod for your camera this can be a particularly difficult problem to navigate. Scanning is the best way to overcome this issue. The bed of a scanner is perfectly flat, meaning no unexpected changes in perspective and no curled edges in sight. Depending on the size of your image, a scanner will also be able to capture the entire artwork, ensuring none of your masterpiece is cropped out.
Resolution
While phone cameras have come a long way in the past few years, they don’t guarantee high quality. We require images to be 300DPI (dots per inch) to ensure a crisp finish. Anything below that magic number is at risk of appearing blurry or pixelated when printed. You may think the photo you’ve taken of your artwork looks good, but it can still be low resolution, meaning you will lose some of the detail in printing. Using a scanner will allow you to specify the DPI, meaning you can rest easy in the knowledge that a crisp print is being prepared especially for you.
You can read more about resolution here.

How to scan
The scanning process depends on the model of scanner and software on your device. Most have an easy to use interface that will pop up when the scanner is plugged in. There’s a lot of scanner models out there in the world, so unfortunately we can’t go over how to use each one. Along with our handy guide, we recommend keeping your scanners instruction booklet close to hand so you guys can get acquainted with each other.
Still not convinced? The printing process is a form of replication. Bad quality artworks will result in bad quality prints. You’ve spent the time creating an artwork to be proud of, and scanning is the final step in getting the outcome it deserves. If you are unable to scan, please try and avoid the pitfalls of submitting photographs mentioned in this article. Make sure to photograph in high quality, using natural light, and keep the artwork as flat as possible.
If you have any further questions on artwork and scanning, feel free to shoot us an email at artwork@print.work
